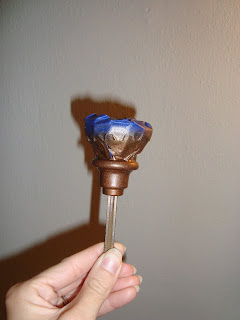
You may remember from this post that we removed all of the window and door hardware in our guest bedroom and stripped the paint off each piece using a crockpot and laundry detergent. While the shiny brass was a big improvement from the multi-layered painted hardware, we thought it needed a little updating. So we got a can of Aged Copper Rust-Oleum from Lowe's and went to town (is it just me or is it ironic that we wanted to update and got a paint called "Aged" Copper...). And our hardware went from looking like this:
To this:
To this (sorry, forgot to get a shot of all of the pieces, but here are a few!):
Here are some tips if you are looking to do some hardware painting:
1. Use painter's tape (works like a charm every time) to tape off any piece of the hardware that you do not want painted - like so:
2. To paint the screws (because yes, those need to get painted too!), screw them into a cardboard box so that they stand upright and give them a few coats - like so:
3. And lastly, (we didn't do this but wish we had) try to label your screws and hardware so that you know which goes where when it's time to put them back on. It will save a lot of time, trial, and error!
Have a wonderful and safe holiday weekend!
Subscribe to:
Post Comments (Atom)


0 comments:
Post a Comment