Ever since Mr. Mull and I finished painting our 2nd guest bedroom mentioned here, we have been working to complete other projects in the room. Projects include (in a nutshell):
- Paint and hang shutters to function as headboard
- Sew curtains (4 panels) and hang hardware
- Sew skirt for bedside table
- Paint wooden door and saw horses to function as desk
- Have glass cut for top of desk
- Accessorize (lamps, pictures, wall decor, knick knacks, etc)
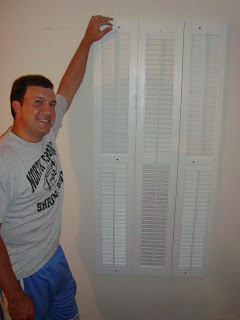
We decided to go ahead and cross the headboard off the list, since we have had the shutters since December and they have been waiting patiently to make their debut in the room. We bought the shutters for $30 at a little salvage place in Greenville, SC. Shutter headboards make a great alternative to a real headboard, as they were obviously very inexpensive and add some uniqueness to a room in place of your traditional headboard. In the post I mentioned above, the shutters were already positioned behind the headboard but they were not painted or hung. Thus, our first task was to paint them a high gloss white to match the room's molding and trim. So we lugged them outside (these jokers may look light, but don't let them fool you--they are heavy!) and propped them up on the saw horses that are later going to become our desk legs. Might as well get as much use out of those horses as we can...We tried to take a shortcut by using high gloss spray paint to cover the shutters (more on this later). We coated each shutter twice and gave them about an hour of drying time.
Here is one shutter complete next to the other still awaiting paint. Although they looked white to begin with, you can see what a difference the coats of paint made. Before we painted each shutter, we arranged them how we wanted them once they were hung on the wall. We decided to alternate between the shutters closed up and down.
And below is a picture of our very imprecise attempt to find the wall studs. We have a battery powered stud finder that came in very handy when locating each stud. However, as you can see by the 6 (yikes) nail holes for our last stud, there were a few complications in locating the final one. Circling it helped us remember which hole was the stud. We made sure the nail holes were all along an even line by measuring down the same distance (9 3/4" ish) from the molding. Then we were ready to drill screws thru the shutters. The studs really dictated where we hung the shutters--we had to make sure that they were positioned in such a way that each shutter could be screwed into 2 studs since the shutters were wide enough to cover 4 of them. We drilled the first screw on the far right shutter and then measured our stud distance from that for the other screws.
Here is a close up of the shutters screwed to the wall. You can see the pencil line we used to mark where the stud was and make it easier to know the exact line we needed the screw to fall on.
And here is Mr. Mull after hanging the first shutter. He was SO proud of himself--the next morning after we were done with the project, I kid you not he asked "What are we doing tonight to the house? I want to use more tools." Typical boy. You can see in this picture based on where the screws are that the shutter fell along 2 studs.
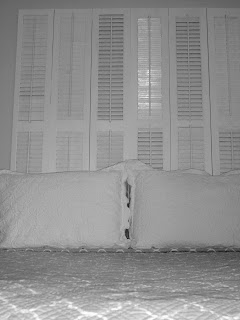
And here are the shutters hung and the bed back in place. I mentioned that we tried to take a short cut by using high gloss spray paint on the shutters. Well, it looked very gray next to our high gloss paint paint, so we ended up painting the shutters again once hung on the wall with real high gloss paint. Oh well, the shortcut was worth a try!
I wanted the "headboard" to be really high and dramatic (I mean, as dramatic as a white headboard can possibly be). The accessorizing component of this room will include large, gray shams behind the white pillows to give some depth to the bed. Also, a tall table lamp like this little guy from Ikea will be a fun addition the the bedside table.

We bought some new sheets to coordinate with our new color scheme (and yes, there are other colors in this room besides gray and white, I promise!). I love the little gray detail along the top of the sheets and sides of each pillowcase.

And since I always want to keep you hanging around for the next project, here is a sneak peak at the material for the table skirt and pillow shams. I wanted something in a solid darker gray, but with a little pattern to keep things interesting. I found the fabric below at Mary Jo's cloth store in Gastonia, NC. If you're anywhere near the area, you MUST stop in! It is by far the best priced fabric store with the most selections that I have ever been in. And I'm no rookie when it comes to fabric stores. It is a wonderful place and truly fits the saying "if we don't have it, you don't need it". They have a little bit of everything.

So until next time, that is what's new at the Mull residence.
Have any questions about this post? Feel free to leave me a comment! And if you're reading along, I invite you to "Follow Me" or subscribe to the blog. I would love to know who all is following us out there!


you have a beautiful place, and love the shutter to headboard idea...
ReplyDeletejumped over from MMS furniture friday party
@Glenda
ReplyDeleteThank you Glenda--MMS has quite the following for her linky parties!