Thursday, January 10, 2013

Christmas Crafts

When one of my loyal readers asked me to reflect back on Christmas decor around the Mull house, I was thankful since Christmas came and went on this old blog and I didn't get around to posting anything (and let's be honest, I still have a lot of posts to do this month so to have suggestions from readers is awesome). I don't know about y'all, but I always have the best intent mid-Novemeber to take in the holiday season and pace myself--seems it never happens. I had plans to make way more Christmas decorations this year than I actually did, but here's what I did make and here's hoping for more projects next year.
 
 
It started out with this Christmas boxwood wreath pillow that I came across on another blog. You see, I've never made a pillow before, but I've been dying to try one and I thought this one was so sweet but not overly, cheesily Christmas-y. Looked like a good project to me. Going into this project all I really knew about making pillows was that it was similar to sewing curtains--in that you take two same-size pieces of fabric and pin them together inside out, leaving a small opening to bring the fabric right side out once the edges are sewn and then you finish by sewing up the hole. So with that knowledge and the boxwood wreath tutorial, I decided to just wing it. I cut two squares for either side of my pillow from some fabric I already had. Then I took one of those squares and, with a bowl from our kitchen, traced a circle in the middle of it to guide me as I sewed on my boxwood leaves.
 
 
To make my boxwood leaves, I cut (many, tiny) felt circles and then just picked a place to start on the circle I had traced. The tutorial I was following hot glued the leaves on, but I sewed mine on because I felt that would last longer over the years since this baby is going to be in and out of storage a good bit. To sew the leaves on, I just scrunched them on the bottom and sewed them down. The width of the wreath is 2-3 leaves all the way around the circle.
 
 
Once all the leaves were on, it was really starting to look like my inspiration pillow!
 
 
At least it was from the front. Kind of messy in the back...thank goodness noone will ever see that part. With my wreath complete I pinned the fabric squares to one another inside out and sewed with a 1/4"-ish seam allowance on each side and remembered to leave a small whole to pull the fabric right side out.
 
 
Tah-dah! Here she is right side out and stuffed with batting, just before I sewed her up completely.
 
 
After I stuffed and sewed her, I added a cheerful little red bow to finish things off.
 
 
I did use hot glue on the bow, since I wasn't sure how I'd hide my thread ends if I were to sew it on.
 
 
Not too shabby for my first pillow, right? And PS, the background of the finished pillow is a little sneak peak of a major project that will soon be revealed on the blog, so stick around!
 
 
Another little craft I did (last year, and am just now blogging about it) was this snow globe--you have probably seen these on Pinterest and other places by now, but it's an Anthropologie knock-off that was so simple to make! All you need is:
-a mason jar
-tiny trees (can be purchased at craft stores, and even Wal-Mart sometimes)
-bath salts
-and a ribbon, if you really want to get fancy
 
Literally all I did was take the lid off and glue the two trees to the inside top of the lid, then fill the jar with a little bit of bath salts (my salts specifically are Dr. Teal's and they smell goooood), screw the lid on and turn the jar upside down. And then I added my bow and I had a snow globe! I love pretty much anything involving mason jars and this is such an easy project, even for the most elementary of DIYers. And they make great gifts for friends and family--you should try it! 
 
I've already got big plans for Christmas crafts next year, including:
 

{source?}
 
Sewing a tree skirt using this picture as my inspiration, and
 

{source}

making our little family some burlap stockings.

Did you make anything for Christmas this year? Did the season sneak past you like it did me? I figure I'll have to start working on these mid-summer if I know myself (I think I do) and hope to get them finished by next year's holidays!

This post is part of the series:
 
 
To read other posts in this series click on the links below:
 

This Little Light of Mine

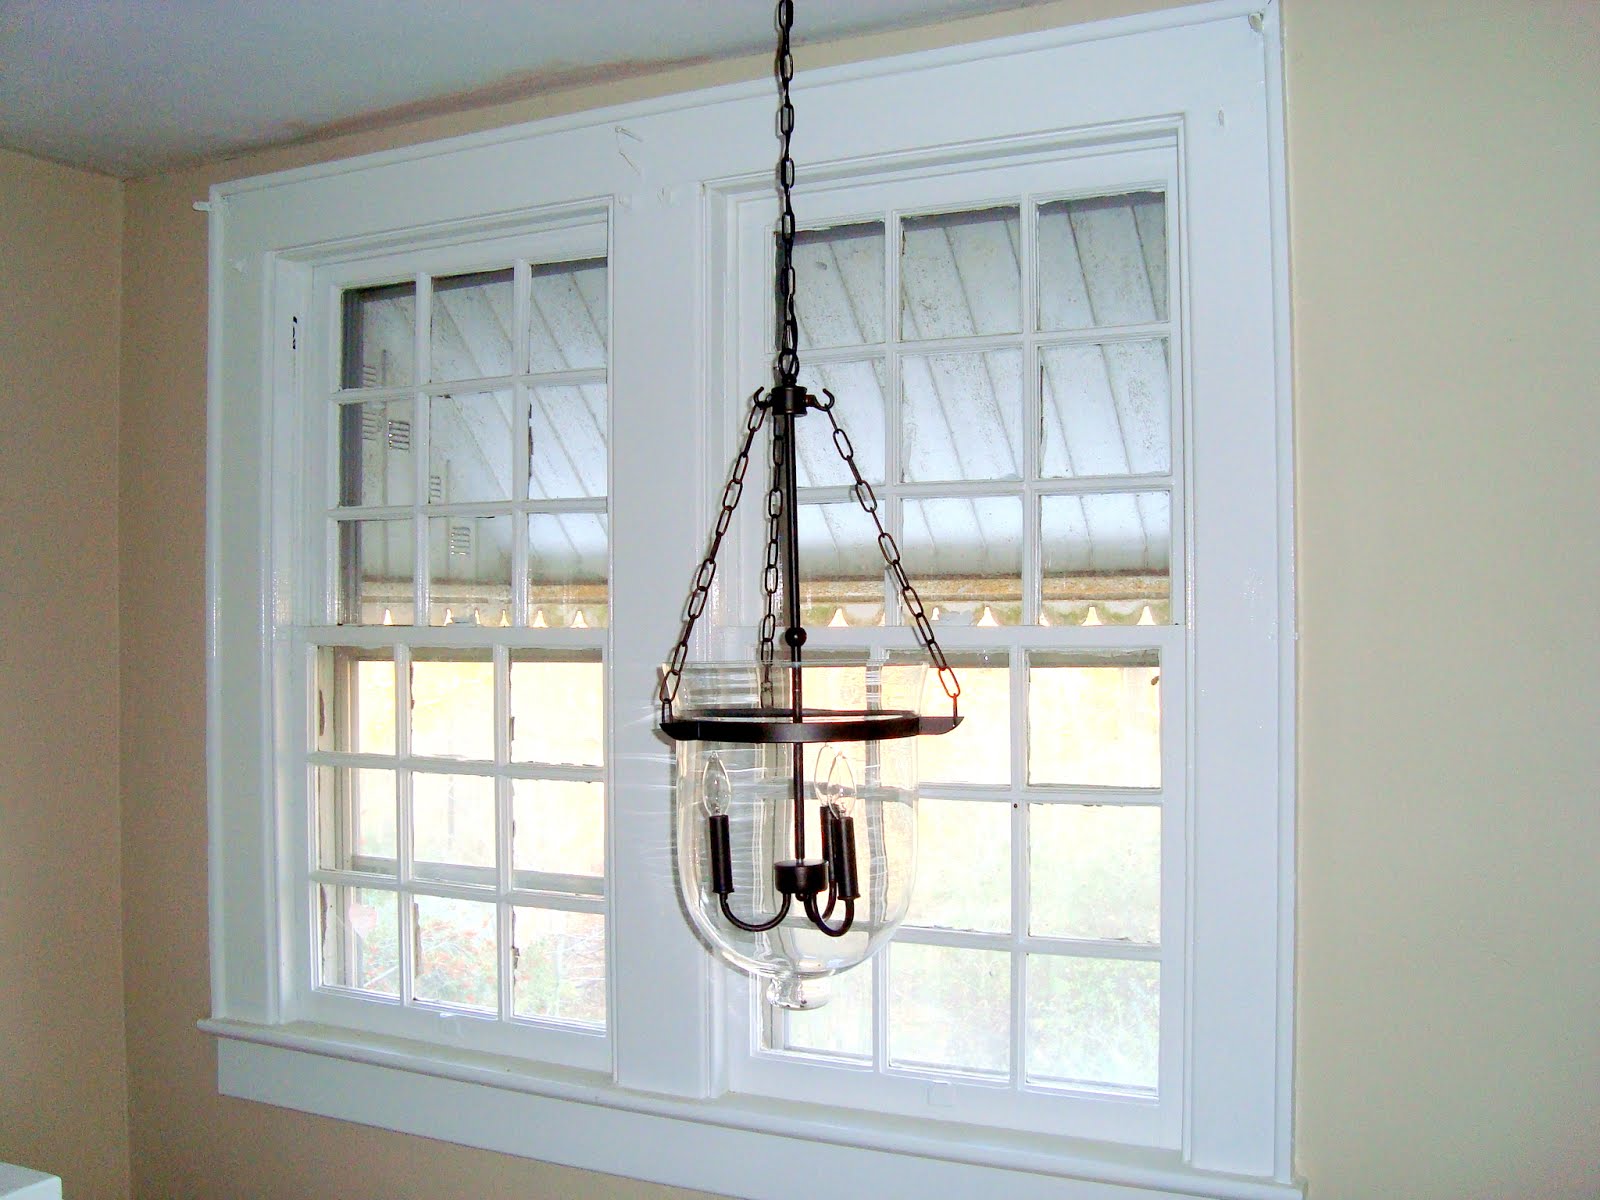
Yep, that's right. We got a special new light in our house. I've been pondering adding something over our staircase (there was nothing there before) and we finally bit the bullet just before Christmas and called our electrician, Vernon, out to hang our new chandelier. But first things first...


We had to choose what we wanted. I knew that I wanted something that felt like it fit with the period of our home, so that pretty much eliminated any modern fixtures. I also kind of had a general idea of the look I was going for. The chandelier pictured above is from Overstock for $154.99 and was our first contender. The one pictured below was never a contender, but I just wanted to show you readers that if at first you find something you love but it's more than you want to pay, have patience and look for something similar elsewhere. The chandeliers below are from Pottery Barn and darn if they didn't look nearly identical to the Overstock fixture, but for TWICE the price. Ridiculous!


We also considered this little lantern-shaped chandy. This one ran a smidge cheaper than the first at $149, but the first one won me over--and I'm not going to lie, seeing how good it's identical twin looked in the Pottery Barn pictures was probably a big reason. We ended up snagging our new chandelier with free shipping (free shipping at Overstock with any order $50 or more) and a 10% off coupon for signing up for emails. You do the math, but with tax I think our total came to $138ish.


I must say, my pictures totally don't do this fixture justice. In person it is so beautiful and larger than it appears here...what can I say, I'm still learning how to best use my camera and I think lights are hard to capture in general. I tried at night and in the day to get good pictures--if anyone has any tips, please do share!


Vernon had to go into the attic to rig everything up since there was no fixture here previously. I love watching him work--it seriously amazes me how his mind figures out what needs to go where and where he needs to run what.


I spy a pup! Vernon and I discussed at length where we thought the fixture would be best--above the landing near the top of the stairs where they turn, or where we ended up hanging it. Basically, we decided to hang it where we did so that it could hang longer from the ceiling and add a little more drama to the stairs. If we had chosen to hang it over the landing, it would have been much closer to the ceiling for head clearance and I just don't feel like this light would have looked right like that.


We centered it on the window, as you can see in the picture above. I wasn't sure if it would bother me that it isn't centered between the two windows rather than on that one to the right, but it doesn't bother me at all and makes perfect sense when you're actually in the space.


And one last view looking up at it when walking up the stairs (my oh my look at the crack on our ceiling and that paint above the window--ceiling in need of painting, mentally noted). We are super happy with the chandelier we chose, and are enjoying all the extra stairway light that we now have!

 This post is part of the series:


To read other posts in this series, click the links below:


Wednesday, January 9, 2013

Ikea RAST Nightstand Hack

Have y'all seen all the Ikea "hacks" going on in blogland and on Pinterest? They're all over the place. About a year and a half ago we jumped on the hacking train, and thus, this is the tale of how we hacked a pair of RAST nightstands and just got around to blogging about it.

 
It all started with this major dilemma. Remember when I painted this sewing table turned nightstand here? Well, it was a good size and all, but it didn't have ANY storage. That little drawer looking thing there doesn't even pull out, it just hinges to about halfway open. So for real, no storage. And I need storage, as you can see from this picture of my side of the bed. After a few months of living like this (and most times, worse), I decided there had to be a better solution. Not to mention that during all this time, Stuart was using a small chair as his nightstand.

 
Enter our solution--the Ikea RAST chest. A three drawer, solid wood chest for the bargain price of $34.99. Picked up two of 'em. Only problem iss, they aren't too cute if you don't do anything to them = hack time. First, I researched on the Internet and looked at other RAST hacks to see what I liked best. There are literally tons of people that have put their own spin on these little chests. Like most Ikea furniture, the RAST comes unassembled so once we knew the direction we wanted to take ours in, we assembled our chests.


Ta-dah! See what I mean? They aren't much to look at at first. So we got to work. After seeing other projects, we knew we wanted to add some trim to the fronts and sides of our RASTs to give them more of a shaker look. Also, you can see in the Ikea picture of the RAST chest that the sides stick out a little past the drawer fronts. That bothered me and the lattice trim makes the drawers flush with the sides--even more reason to add it! We found lattice in the molding department at Lowe's and used that to trim out the fronts and sides.

 
We cut the short pieces on the front to be 7 3/8"-ish (we are definitely not carpenters, so we just try to get our measurements as close as we can). The longer pieces ended up measuring 20 1/4"-ish and fit inside the short pieces on either end.


There's my main squeeze cutting all the pieces. 4 pieces per drawer x 3 (drawers) x 2 (chests) + 4 pieces per side x 2 (sides) x 2 (chests) equals kind of a lot of cuts. He may kill me for posting this picture of him. It was the dead of summer, hence his lack of a shirt. And those are my pink crocs, not his. But he was wearing them. Too funny not to take a picture of...and post.
 
 
We didn't use any fancy power tools to make cuts--just this miter box that my dad got us from Lowe's for $15.98. We have used this little box on so many different projects--I'd say it's a must-have in a DIYer's toolbox.
 
 
Above you can see one of the chest's drawers all trimmed out. To attach the lattice, we used a strip of wood glue under each piece and then used our super fancy clamping system, aka: soup cans, to apply pressure. Wood glue dries super fast, so this process didn't take long.
 
 
Once we finished with the drawers, we added a piece of baseboard molding across the bottom fronts of each chest. If you look back to the picture with the soup cans and/or the actual Ikea picture near the top, you'll notice that the bottoms of the chests were indented. Me no likey. So this piece of molding hides that. We nailed it down, sunk the nail holes, and filled them with wood putty.

 
But oh no! Look what happened--the baseboard molding was a little too tall and made our chests off-kilter. So we justed added a piece of molding under each chest and that steadied them (see below).

 
We also sunk all the screws we had to use assembling the pieces and puttied over them, then sanded.


Lastly, we made tops for our RASTs. In the picture above, you can see that the sides come up a little over the top of the piece. Again, me no likey. So we got some stain-grade wood and cut it to fit exactly on top. We also got some stain-grade trim (similar to our lattice) to add to the side of our new top. We used wood glue and a few nails to hold the top together. I'm sorry I don't have more pictures from the side so you can see how it fits on there, put it basically looks like an upside down tray that fits snug on top.

 
View from above, pre-stain. After we got everything built, it was time to stain and paint.

 
We used a red mahogany stain on the tops, which is the same stain color on our hardwood floors. We did three coats of stain, followed by polyurethane to seal, protect, and make our tops shiny. Then we painted the rest of the piece Valspar's Dove White. We ordered these drawer pulls from Lee Valley Tools--they are the 43mm x 51mm OB ring pulls and were selling for $2.05 each when we snagged them.


Look at my side now! (you can tell this is an old picture now that you've seen how the butterfly prints are looking these days!). I can honestly say that my side is now tidy {pretty much} all the time, thanks to all the storage those three drawers provide.

 
And here they are all matchy-matchy, his and hers bedside tables. We have had them finished for a good long while and are still just as pleased with them now as the day we declared them complete!
 
This post is part of the series:

To read other posts in this series click on the links below:


Monday, January 7, 2013

Going for the Gold

Lately I've been adding a smidge of gold to our bedroom in the form of frames to mix things up a bit and balance out the other metal finish we've got going on (oil-rubbed bronze on our monogrammed lamp bases and our drapery hardware).


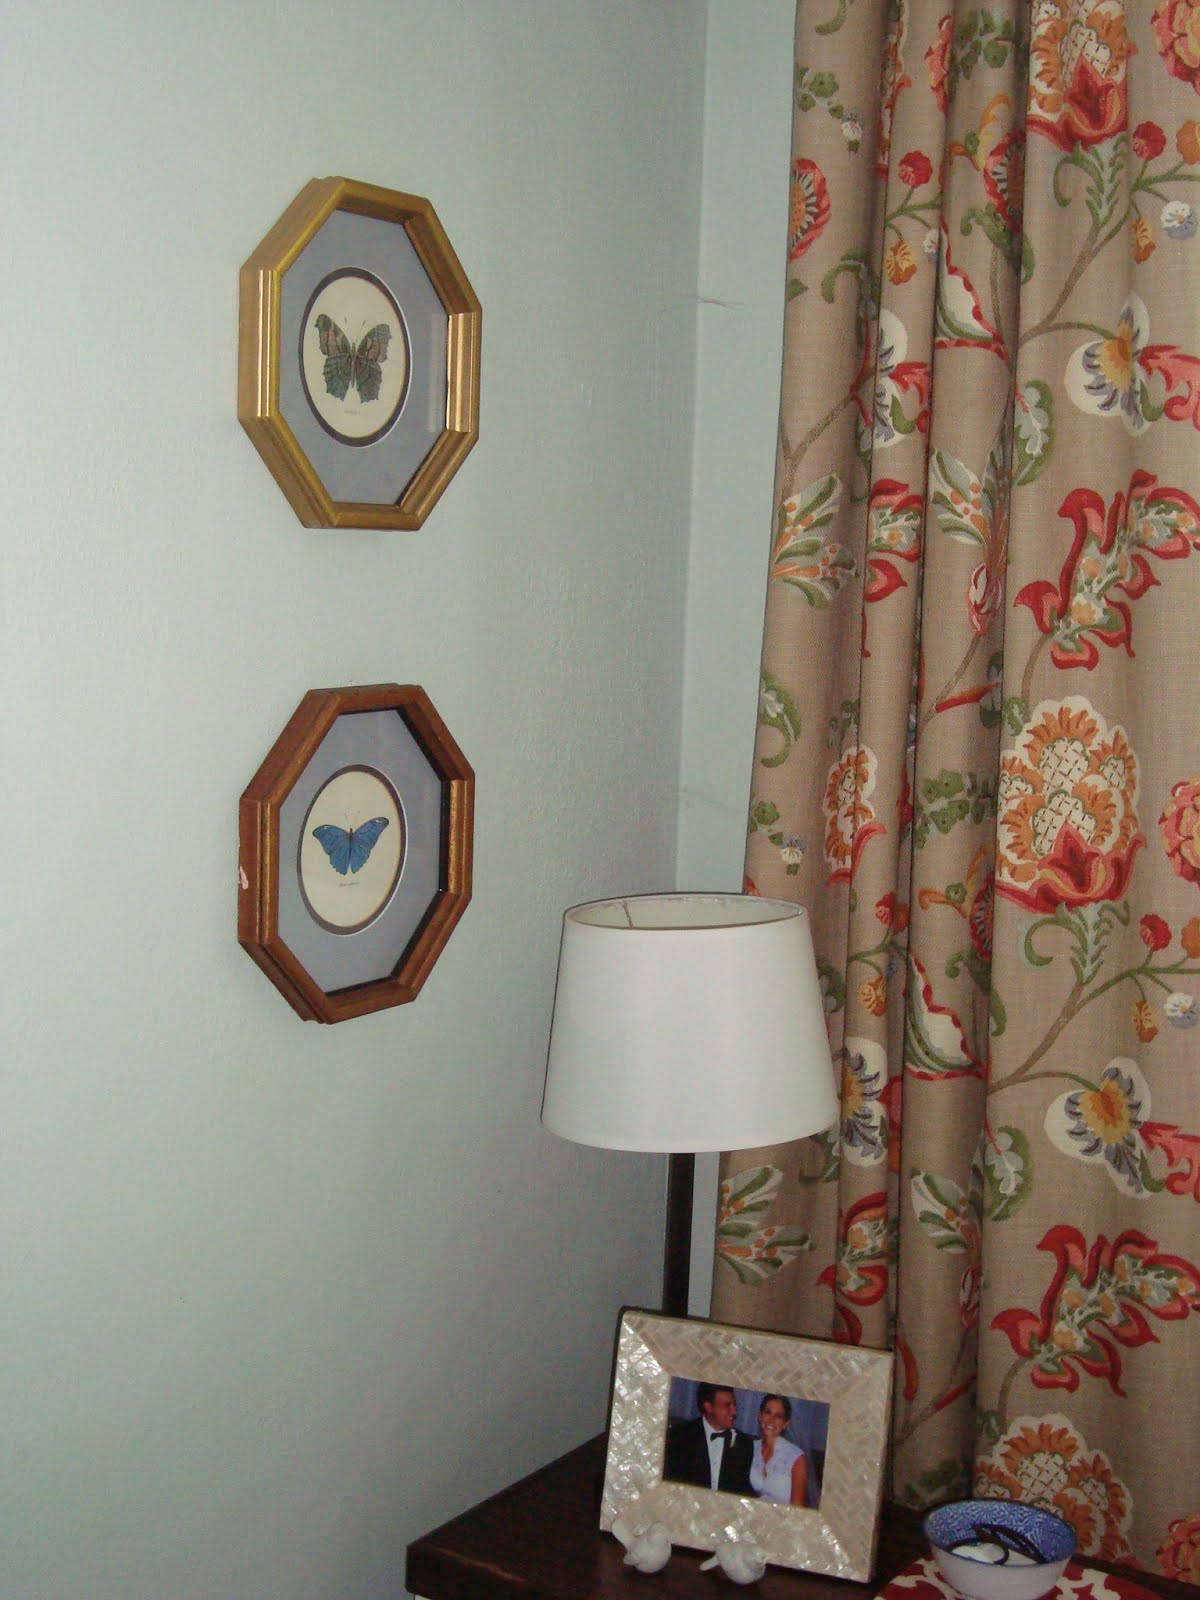
Remember these framed butterfly prints that I briefly talked about in this post on the evolution of our bedroom? We picked them up for $20 at our friends' store here in Hickory, The Hickory Tree. I knew when we got them that I would need to give them some new life, but I really loved the butterfly prints and the octagonal shape. They came with that blue matting on top of a small, navy blue matted circle. And the frame--oh, the frame!--it was like a splattered gold and red, very interesting.


Here's what they looked like in the bedroom post...I had painted one frame with some old gold leaf but that was all I'd done.
 
 
So, after that post I bought some new gold leaf at Hobby Lobby since our old bottle was kind of chunky and painted both of the frames. The gold leaf I ended up going with was a little tiny bottle that I used a small paintbrush to paint the frames with. It doesn't look as gold leaf-y as the gold leaf paper you can buy, but does look a step up from gold spray paint, in my opinion. After painting the frames, I painted the larger matte white and the smaller one a mushroom brown. #fail. It didn't look good. I thought it would, but it didn't. And #biggerfail, I cracked one of the frame's glass so I had to remove both of them.


When I have a project that doesn't turn out the way I had hoped, I have to have some room from it. Let it sit for a while before I can get back to it. So those prints hung on my wall with the ugly white matte for probably a good month or two. And then one night, bam, I'd had enough space and was ready to work on them again. Couldn't stand to see them in their poor condition for a second longer. I left the inner circle the mushroom brown, and covered the outer mattes with a fabric that coordinates well with our curtains.


To get the fabric to adhere, I first cut a piece that would cover the whole matte with a little hanging over the edges. Then I eyed where I wanted it to line up and just put a strip of hot glue on on the back of every side of the matte and pressed the fabric, then trimmed any excess.


I cut a hole in the center and went around the back of the inner circle to glue the fabric there. Then I put the mattes back together, again with hot glue, and put them back in their frames and wah-lah.


So it kind of worked out that I broke one piece of glass since I think I would have left them like this even if that hadn't happened. I've used this fabric in some other places in our home and was lucky enough to find it for $1/yard at our local Habitat store. Lucky indeed, since at the time it was listed on Ballard Designs site for about $30/yard. I'm also going to use it on some pillows in our bedroom.


And here is a shot just for some perspective of where these are hanging in our bedroom...what do you think--improvement?


I also added a little bling to this formerly unframed painting of our house that you saw here. It looks pretty bare in that picture above, poor thing.


So I added this chunky wooden frame that I picked up at Hobby Lobby. I used a 40% off coupon that I found online so this frame rang in at $38.


Not too shabby, considering what you would pay to have it custom framed.


I love the little gold detailing that came on it. Just enough to add a little pop to the frame! Don't you think it happies up the painting?...because happies is a word--a verb, no less.


And that pretty much wraps up how we're "going for the gold" in our bedroom (er--did that sound awkward?)! How do you feel about mixing up finishes? How do you feel about gold? I think it's back to stay, for reals.

PS : Look for two posts tomorrow, since I'm doubling up from Saturday!

This post is part of the series:


To read other posts, click the links below: