For those of you hoping to get a steamy read based on the title of this post, you'll be disappointed! Welcome to Nooky: Part I, the first part of the two-part tale about how our downstairs hallway nook (which we now affectionately call Nooky) got a brand new look.

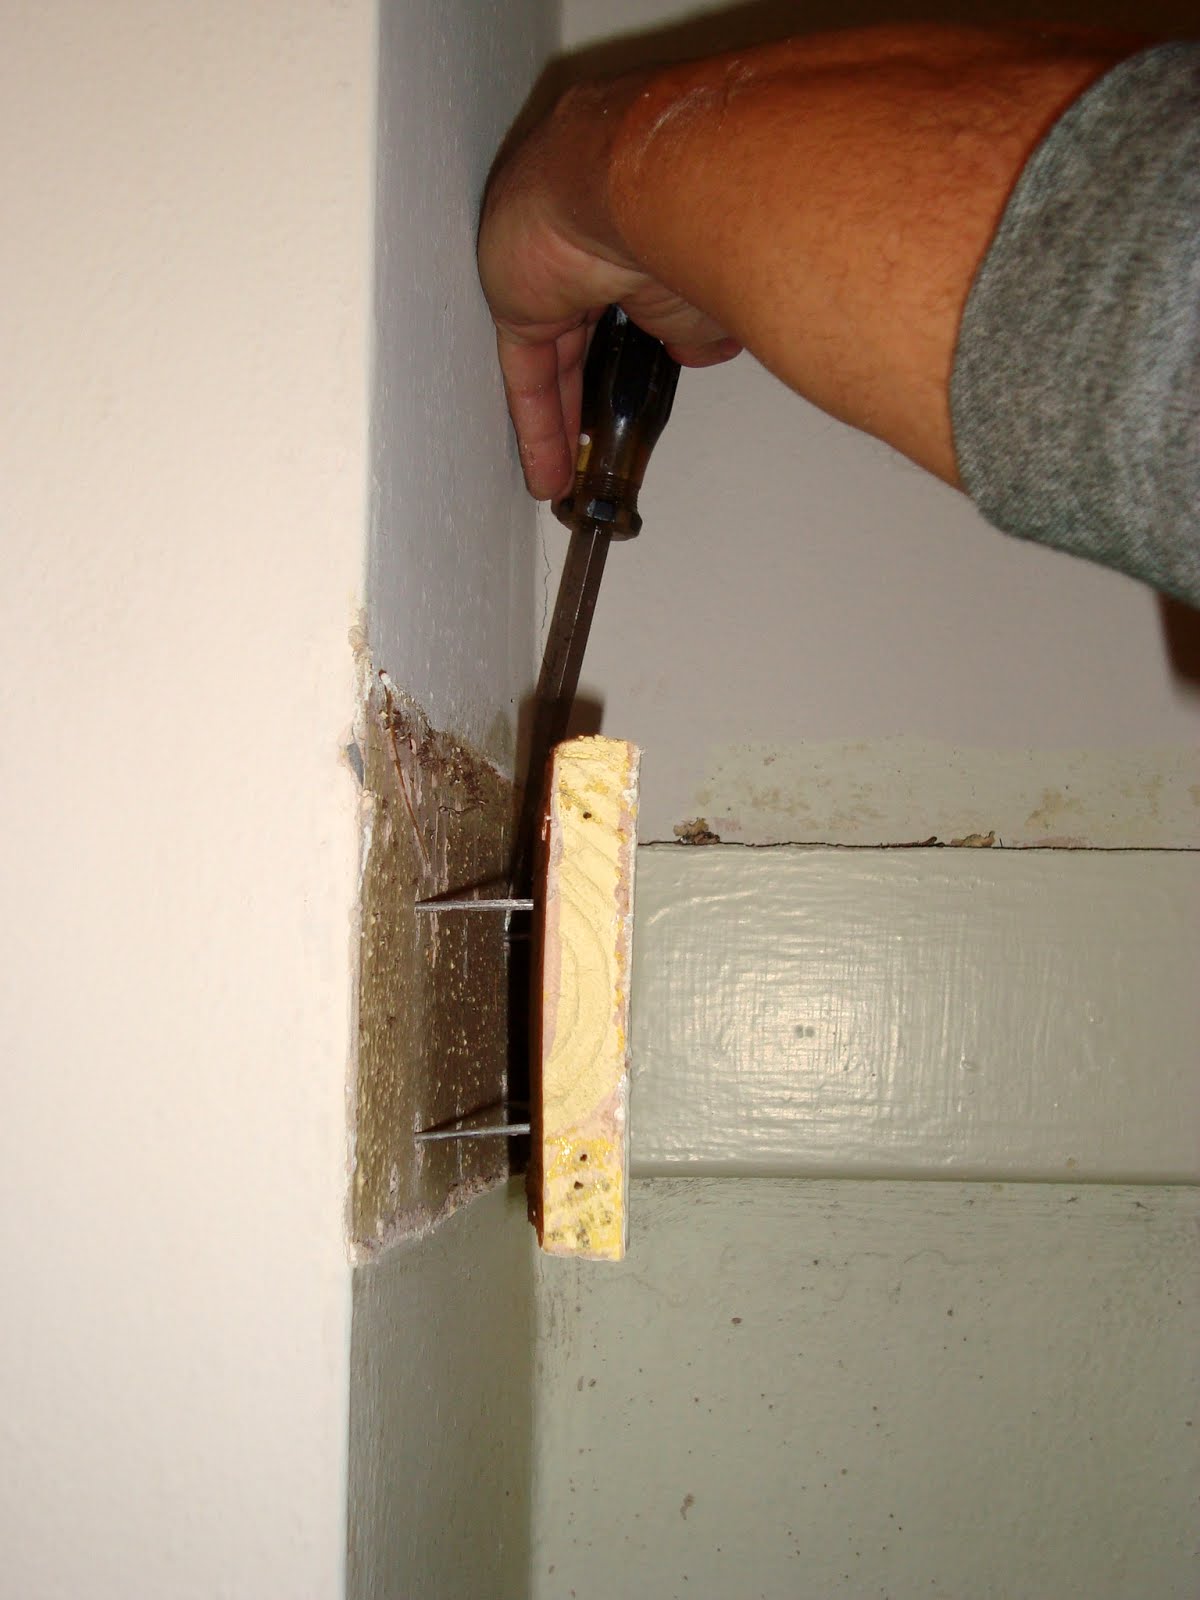
The journey started with this space in our downstairs hallway. It is on your right when you walk in from our entryway and one of the first things that people see when they come to our house (see 4 pictures down to the picture taken towards the door to get a better idea of where it is when you come in). Nooky started out looking pretty rough--a single shelf and those two steel bars coming out of the wall. I snapped the above picture right before demoition was about to take place, hence the screwdriver wedged behind one of those bars!

Here is a shot from a little further away--nooky is hard to photograph because there's not enough room in the hallway to get a full frontal picture. But you get the idea--just a little carved out space that had a smidge of function (we had been hanging our coats on those bars) and absolutely no aesthetic appeal.

Frontal shot of the nook--this is seriously about all that I can capture when I take a picture standing directly in front of the space.

Up close and personal with one of the steel bars that was here before...very, um, industrial looking for such an old home!

And a shot back towards our front door so you get an idea of where the nook is as you enter our home (the living room is thru that door frame and to the right, the stairs are directly to the left--you can see my plaid shirt hanging on the banister :) ). Since the nook was only partly functional (lots of wasted space) and not the least bit easy on the eyes, we decided to give it a complete makeover.
We removed the shelf and bars first (the bars ended up easily unscrewing from the wall), and then removed the wood that had been supporting the shelf.

You would think that part would be easy peasy, but whoever built the house used the longest nails we have ever seen and plenty of them to attach that wood to the wall.

It took a good 30 minutes of crowbar action and much sweat on Stuart's part to finally remove the pieces of supporting wood, but he got it done and we were left with an empty nook and a lot of nail holes.

We also removed the molding along the baseboard, which was crazy in and of itself. Turns out, there are tons of little pieces of wood and bits of things in our walls--insulation circa 1928 I guess?

There's always a point in projects like this where you think to yourself "Self, have you just opened up a can of worms?". The picture above was that moment for us where there was no turning back and we knew we'd have to finish what we started. You see, some of the plaster came down when we removed that wood just like in our bathroom reno, if you'll remember. No turning back, don't get scared now (Home Alone, anyone?)!

So here is a full shot of nooky before we started putting her back together again.

This picture I pinned on Pinterest is what we used as our inspiration--I'm not sure if there is a tutorial on Beneath My Heart blog or not, because we just used the picture to develop a general look that we were going for and did our own thing from there. We knew we wanted a bench for storage, board and batten walls, and those little cubbies for additional storage. From there we took measurements of the nook and I drew a rough sketch for Stuart of exactly what I wanted. We probably spent about an hour actually planning the project and then headed to Lowe's for all of our supplies (I'll be more than happy to provide a detailed supply list if anyone wants it or has any questions about what we used--just leave me a comment in the comment section at the end of this post).

We started out by building the bench. Our walls are completely not square and we knew this going into the project from other things we've done around the house so we knew that we would have to build the bench in place and that we would have to shave off pieces in certain places to accomodate for our wonky walls. We laid the bottom of the bench first. Then we screwed the dividing slats (the two pieces standing upright in the middle) to the back piece and screwed it to that back wall. Last we screwed the two end pieces to either wall that they were touching.

With all of those pieces in place, Stuat screwed the front piece of our bench to the middle slats and darn if it wasn't starting to look like something at that point!

Bench cubbies!

Another angle.

The view from above!

And you know we couldn't just leave the front of the bench looking all plain. We attached some beadboard to the front with liquid nails and then trimmed it out with some thin pieces of wood.

Next we made the top. We used one large piece of wood and just cut a large part out of it that will be on hinges to open the bench. We screwed the piece down on all sides and then tested our work to make sure everything was sturdy by both sitting on the bench--it passed our inspection.

So next we turned our attention to the sides of nooky. Like I mentioned before, we really wanted a board and batten look so that was the next leg of the project. Our walls are plaster and I really wanted the board and batten to look built in and not just like 1 x 3s nailed to the wall, so we used those dark brown sheets you see (they are super thin, but sturdy) to cover the plaster and thus, give the sides of nooky a smoothe look.

Then we started adding our 1 x 3s to create the board and batten effect.

To move ahead, we had to patch up that little hole we created so that we could screw our wood into it--whoops! Thankfully we already had some drywall on hand from our bathroom reno and just cut it to fit the space. It didn't have to be perfect, since this would soon be covered with the rest of our project.

And that, my friends, is where I leave you--with the bench complete and the board and batten started. You'll have to wait until after the weekend to see how Nooky: Part II unfolds!
To see how this tale ends, click here!
This post is part of the series:

To read other posts in this series click the links below:


I'm beyond excited to see what Nooky looks like when she is all done! Love you updating your blog every day :)
ReplyDelete@Natalie, I think you're going to like it!
ReplyDelete