For those of you hoping to get a steamy read based on the title of this post, you'll be disappointed! Welcome to Nooky: Part II, the second part of the two-part tale about how our downstairs hallway nook (which we now affectionately call Nooky) got a brand new look.

Last we left off was here where we had just patched a hole so we could start screwing in the vertical boards to create our board and batten walls.

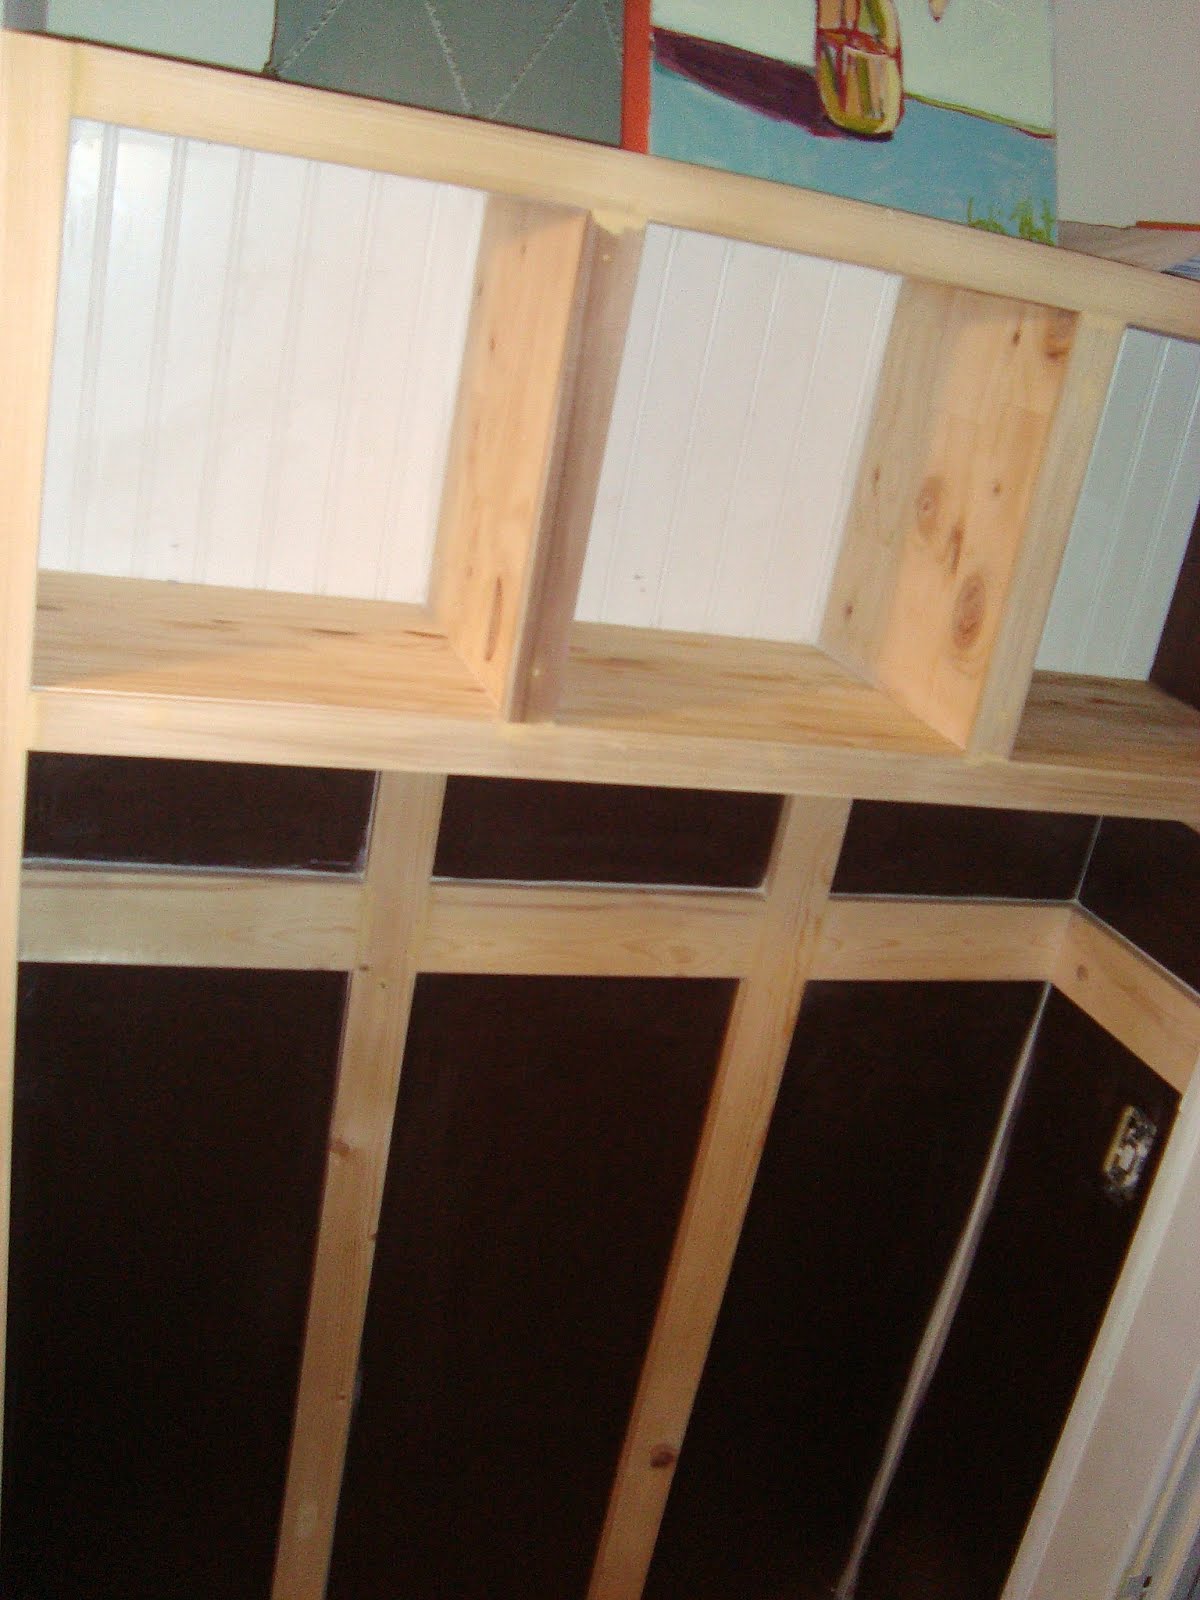
Once those were hung we began on the top cubbies. We first attached the supporting cubby shelf to the horizontal board and batten boards underneath. I wanted the cubbies to be backed in beadboard, so we used liquid nails to attach beadboard across the back wall. Like the bench, we had to build the cubbies in place since we were working with unsquare walls.


Once the bottom shelf and beadboard were installed, we screwed in slats across the top just like we did in the bench.

Then we put a board across the top of the slats to form the "roof" of the cubbies. (Side note: Those pieces of trim you see lying on the bench we used to trim out where the bench meets the wall).

We also added some trim to the front of the cubbies to give the appearance that we used thicker wood than we actually did.

See that enormous crack between the dark siding we used to make our walls smoothe? We filled it and a lot more places where boards and siding met with caulk to finish things off.
We also made sure to sink all of our screws and fill them with wood putty. I swear, caulk and wood filler can make a project go from the "Are we sure this was a good idea?" stage to the "Dang, we did this ourselves and it looks amazing!" finish. So with no further ado, let me introduce you to the finished nooky!

After sanding all the wood filler, we prepped the nook for paint by wiping it down really well and vacuuming up all the dust.
We painted it in three coats of high gloss white to match the rest of the trim and doors throughout our house.

I used a small foam roller and an angled brush to get good coverage while getting into all the nooks and crannies (no pun intended).

Here is a view looking back towards the front door--see how convenient it's going to be when you come in to just hang your coat in the nook?

And here is a view looking down the hall the other way--there is the downstairs 1/2 bath right past the nook, and the pantry door on the right beyond that.

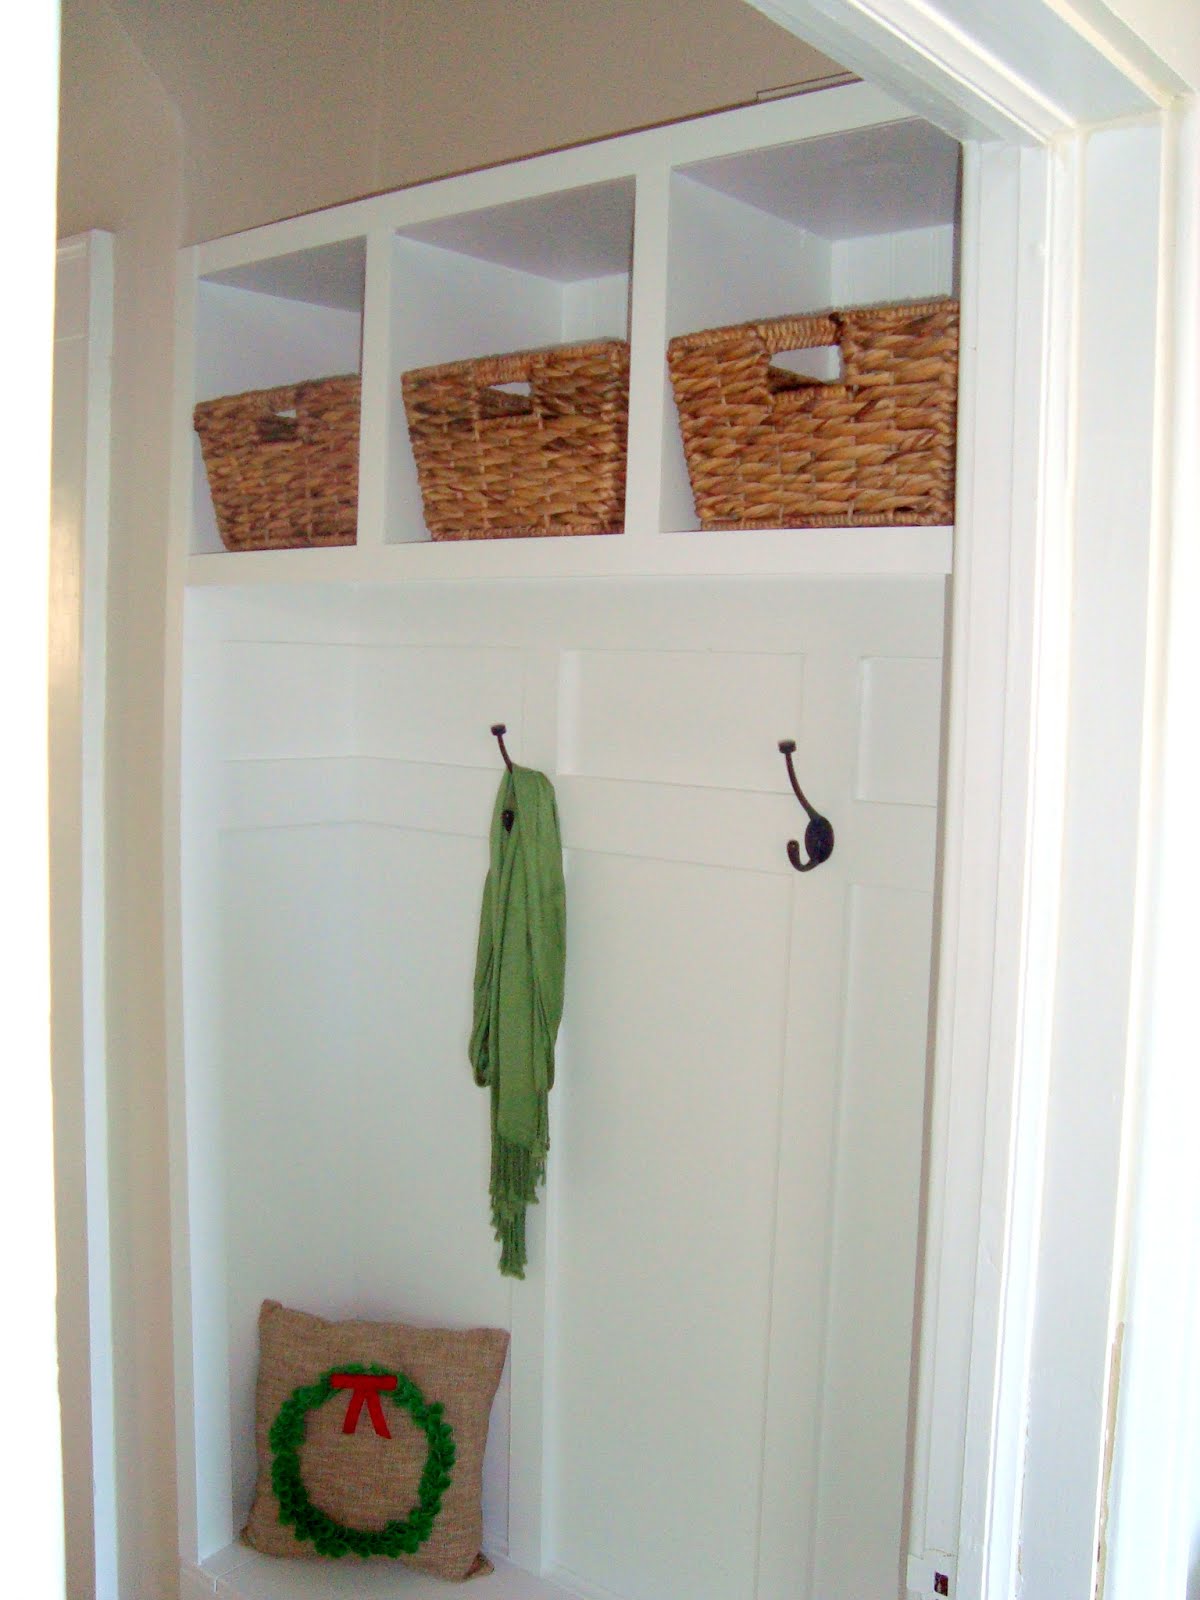
We decided to hang two hooks (that we got from Lowe's) in the nook as opposed to three, although we can easily change it some day if we need more hooks.

The baskets are from World Market. They were $9.99 each, but came to just around $22 because all baskets were 25% off and I received another 10% off coupon from a fellow shopper who didn't end up buying anything!

Here's a look inside the bench. So far, we have been storing outdoor things like the football, Smyth's spend the night back in the center, and overflow items from the living room in the right compartment.


We haven't put anything in the baskets yet, as I'm trying to be sure that they are here to stay. I'm not sure if I like the fact that there is so much space between them and the top of the cubbies or if I would prefer taller baskets to take up more space...what do you think? Once we do use them for storage, it will most likely be for things like Smyth's leash, gloves, etc.

And there you have it, the long awaited Nooky: Part II. We're pretty smitten with it, I must admit!
Have you entered the Fine Lines Art & Design giveaway yet? If not, you've still got until tomorrow at 10pm so enter now by clicking the picture below and following the instructions in the giveaway post!


This is my favorite thing from your whole blog. I think it looks amazing!
ReplyDelete@Natalie, thank you! When are you coming back???
ReplyDelete